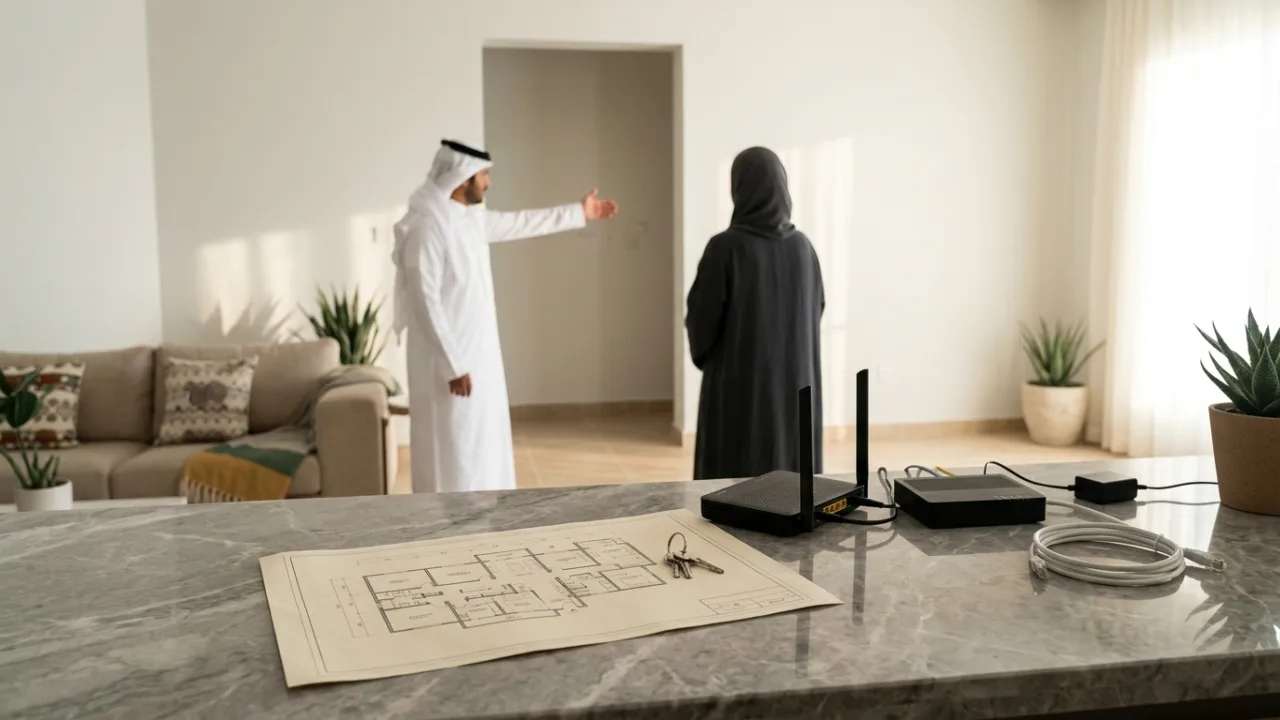
Internet deserves an early place on your new-home checklist. Confirm the complete address, building fiber access and Salam HomeFi 5G eligibility before assuming a particular plan can be installed. Then compare current plan terms and equipment details.
Check Salam coverage before moving day and review eligible plans when choosing a new subscription.
- Architectural Engineering Reality: Why Home Networks Must Precede Plastering and Concrete Pours
- Phase 1: The Exterior Fiber Ingress Pathway: Perimeter Boundary to Central Media Cabinet
- Phase 2: Central Low-Current Media Cabinet Design: Dimensions, Power, and Environmental Criteria
- The Faraday Cage Trap: Why Primary Wi-Fi Gateways Must Never Reside in Metal Cabinets
- Phase 3: Structured Copper Cabling (Cat6 / Cat6A): Star Topology and Port Provisioning
- Phase 4: In-Ceiling Wireless Infrastructure: Planning In-Ceiling PoE Access Points
- Phase 5: Fiber-to-the-Room (FTTR) Architectural Preparation: Micro-Duct Pathways
- Phase 6: Exterior Perimeter Infrastructure: CCTV Surveillance, Smart Intercoms, and Landscape Wi-Fi
- Phase 7: Pre-Plastering Quality Audits: Conduit Integrity, Fish Tapes, and Cable Certification
- Phase 8: Certified service provider Field Commissioning and Service Activation
- The Builder's Master Structured Cabling Checklist
1. Architectural Engineering Reality: Why Home Networks Must Precede Plastering and Concrete Pours#
Modern residential architecture across Saudi Arabia incorporates robust civil construction methods: reinforced concrete framing, heavy clay masonry blocks, thermal insulation barrier layers, and double-glazed low-emissivity glass facades. While these materials deliver exceptional thermal efficiency and structural resilience, they represent severe physical barriers to radio-frequency electromagnetic propagation:
- High-frequency wireless bands (5 GHz and 6 GHz) suffer up to 80% signal attenuation when attempting to penetrate a single 200 mm reinforced concrete load-bearing wall.
- Solid multi-story concrete floor slabs present virtually impenetrable RF barriers. Expecting a single ISP gateway stationed on the ground floor to deliver reliable wireless coverage across a three-level villa violates elementary laws of physics.
- Installing an additional 25 mm rigid PVC conduit during electrical rough-ins incurs negligible material costs. In stark contrast, cutting into gypsum ceiling panels or drilling through decorative wall paneling post-occupancy costs thousands of riyals and permanently compromises interior aesthetics.
Disciplined network architecture relies upon a robust, hardwired copper and optical backbone that transports gigabit signals to every quadrant of the residence, offloading client distribution to strategically positioned access points.
2. Phase 1: The Exterior Fiber Ingress Pathway: Perimeter Boundary to Central Media Cabinet#
The delivery of uncompromised gigabit fiber broadband originates from the municipal street right-of-way. Establishing a reliable, protected conduit path from the property boundary to the interior distribution hub is the vital first step:
A. The Perimeter Boundary Enclosure (Exterior Demarcation Box)#
- Install a heavy-duty, UV-stabilized, weatherproof telecommunications demarcation box on the exterior boundary wall or adjacent to the pedestrian service gate at a height of 1.2 to 1.5 meters above finished grade.
- This enclosure marks the physical handoff boundary where municipal fiber drop cables deployed by network operators (service provider, Dawiyat, or STC) splice into the villa's internal conduits.
B. Rigid Conduit Engineering Specifications: Boundary to Interior Cabinet#
- Conduit Diameter: Utilize heavy-duty smooth-bore rigid PVC conduit with an internal diameter of no less than 1 inch (25 mm to 32 mm). Never permit electricians to install narrow 16 mm electrical conduits; heavy armored outdoor optical drop cables require ample clearance to prevent jacket binding.
- Sweep Bends vs Sharp Elbows: Single-mode glass optical cores fracture under acute mechanical strain. The use of standard 90-degree plumbing or electrical pull elbows is strictly prohibited. All directional turns must employ long sweep radius elbows (minimum bend radius of 150 mm).
- Integrated Pull Wire (Fish Tape): Prior to backfilling trenches or pouring perimeter concrete slabs, thread a continuous galvanized steel pull wire or high-tensile nylon cord through the entire conduit run, securing both ends inside the boundary box and the central media cabinet.
3. Phase 2: Central Low-Current Media Cabinet Design: Dimensions, Power, and Environmental Criteria#
The central low-current media panel serves as the digital heart of the residence, terminating all incoming telecommunications drops, structured Ethernet home-runs, CCTV camera feeds, smart home controllers, and intercom links.
A. Ideal Cabinet Placement#
- Locate the cabinet in an accessible, centrally situated utility space: a dedicated server or IT closet, a ventilated utility room, a conditioned under-stair storage room, or a discrete secondary hallway.
- Avoid locating the cabinet in areas exposed to extreme temperatures or high moisture levels, such as unventilated rooftop mechanical penthouses, outdoor generator rooms, or commercial kitchen prep zones.
B. Structural and Electrical Cabinet Criteria#
- Rack Sizing: For standard multi-level residential villas, install a wall-mounted 9U or 12U equipment rack with a minimum depth of 450 mm.
- Dedicated Clean Power: Equip the enclosure with a dedicated dual-gang 220V electrical outlet fed from an isolated circuit breaker. This powers the optical network terminal (ONT), central Power over Ethernet (PoE) network switch, and CCTV network video recorder (NVR).
- Thermal Management: Active networking hardware generates continuous thermal dissipation. Ensure the rack incorporates passive ventilation louvers or an integrated thermostatically controlled exhaust fan to prevent thermal throttling.
- Structured Patch Panel: Terminate all incoming Cat6/Cat6A field drops onto a 24-port modular patch panel to facilitate tidy patching and long-term diagnostic troubleshooting.
4. The Faraday Cage Trap: Why Primary Wi-Fi Gateways Must Never Reside in Metal Cabinets#
This scenario represents the single most destructive mistake committed during domestic fit-outs across Saudi Arabia:
Electricians place the primary ISP Wi-Fi gateway directly inside the heavy sheet-metal low-current cabinet, close the metal door, and shut the enclosure inside an under-stair closet!
The Catastrophic Result: The Faraday Cage Phenomenon#
- The continuous grounded steel casing of the media panel acts as an RF absorption shield, blocking up to 90% of radiated wireless electromagnetic energy.
- Occupants in adjacent living rooms experience severe signal degradation, extreme jitter, and frequent packet drops, erroneously blaming their gigabit fiber connection for poor wireless propagation caused by enclosure shielding.
The Engineering Remedy: Decoupling Optical Reception from Wireless Radiators#
- The Optical Network Terminal (ONT) and core wired Ethernet switch remain inside the metal cabinet, safely organizing power and patch distribution.
- An unshielded Cat6 cable routes from the switch to an open, elevated central location in the main family living space, where the primary Wi-Fi 6/7 gateway or mesh node operates with unimpeded line-of-sight propagation.
5. Phase 3: Structured Copper Cabling (Cat6 / Cat6A): Star Topology and Port Provisioning#
High-performance wireless distribution relies upon an unshakeable hardwired copper foundation:
A. Dedicated Star Topology (Home-Run Cabling)#
- Every network drop must run as an unbroken, continuous cable pulled directly from the central patch panel to the individual room faceplate without intermediate junction boxes or mechanical taps.
- Structured data cables must never share conduits with 220V/380V electrical wiring. Parallel runs require a physical clearance distance of at least 200 mm to prevent electromagnetic induction from degrading data packet headers. Where data and electrical conduits intersect, they must cross at precise 90-degree perpendicular angles.
B. Cable Specification: Cat6 vs Cat6A#
- 100% Solid Bare Copper Cat6: Complies with ANSI/TIA-568 standards, delivering 1 Gbps up to 100 meters and supporting 10 Gbps up to 35–55 meters. Ideal for standard domestic networking, 4K streaming, and gaming.
- Avoid counterfeit or substandard Copper-Clad Aluminum (CCA) cables. CCA conductors suffer from high DC resistance, brittle tensile strength, and severe overheating when subjected to PoE loads.
- Shielded Cat6A (STP/FTP): Highly recommended for expansive estate properties, multi-story lift shaft cabling, and server backbones, sustaining 10 Gbps throughput across the full 100-meter channel distance.
C. Strategic Room Port Allocations#
- Home Executive Office: Minimum of two dedicated RJ45 ports for high-throughput workstation docking and network-attached storage (NAS).
- Living Rooms and Entertainment Consoles: Dual RJ45 ports behind smart TV media consoles to hardwire 4K displays, gaming consoles, and streaming appliances directly, eliminating wireless latency.
- Bedrooms and Guest Suites: At least one dedicated RJ45 outlet per bedroom to support telecommuting and remote learning without loading the wireless spectrum.
6. Phase 4: In-Ceiling Wireless Infrastructure: Planning In-Ceiling PoE Access Points#
For contemporary open-plan villas, ceiling-recessed Access Points (APs) provide the ultimate fusion of aesthetic refinement and RF performance:
- Discreet Architectural Integration: In-ceiling APs resemble sleek, low-profile smoke alarms, completely removing messy desktop routers and wall-wart power supplies from living spaces.
- Power over Ethernet (PoE) Operation: In-ceiling units require zero local electrical sockets; both high-speed data and DC power transmit simultaneously over the single Cat6 cable connected to the central PoE switch.
- Multi-Level Distribution Blueprint:
- Ground Floor: One central ceiling AP positioned in the main hallway between the majlis and open living pavilion.
- First Floor: One central ceiling AP in the family bedroom vestibule.
- Penthouse / Rooftop Lounge / Basement: Dedicated local APs serving leisure suites and outdoor terrace entertainment areas.
7. Phase 5: Fiber-to-the-Room (FTTR) Architectural Preparation: Micro-Duct Pathways#
service provider's revolutionary Fiber-to-the-Room (FTTR) technology represents the absolute vanguard of residential telecom deployment in Saudi Arabia:
- Rather than relying on copper Ethernet, FTTR deploys transparent, nearly invisible micro-optical fiber lines directly into individual rooms, connecting miniature edge optical routers that deliver flawless gigabit speeds and sub-millisecond latencies across every room.
- Preparing for FTTR During Construction:
- Ensure internal PVC wall conduits connecting the media cabinet to individual room junction boxes maintain minimum internal diameters of 20 mm.
- Maintain smooth conduit sweep radii to enable rapid, snag-free pulling of micro-optical drops by certified service provider engineers.
- Pre-installing dedicated conduit pathways eliminates the necessity of surface-mounted adhesive micro-fiber clips, preserving pristine interior wall finishes and baseboard architecture.
8. Phase 6: Exterior Perimeter Infrastructure: CCTV Surveillance, Smart Intercoms, and Landscape Wi-Fi#
A comprehensive residential telecom design must encompass outdoor security and automation infrastructure:
- Perimeter CCTV Surveillance: Run outdoor-rated, UV-resistant Cat6 cables to exterior perimeter wall corners, garage gates, and courtyard entries to power PoE security cameras directly from the central NVR.
- Smart Video Intercoms: Provide dedicated conduit routing from the exterior pedestrian gate to the central low-current rack, powering smart video door stations and facilitating mobile gate release integration.
- Outdoor Landscape Wi-Fi: Route an exterior-grade conduit to a shaded terrace or pergola post to mount a weatherproof (IP67-rated) outdoor PoE access point, guaranteeing seamless Wi-Fi coverage across gardens and swimming pool decks.
9. Phase 7: Pre-Plastering Quality Audits: Conduit Integrity, Fish Tapes, and Cable Certification#
Before the ceiling contractor seals false gypsum ceilings and painters apply final primer coats, execute this rigorous inspection protocol:
A. Conduit Clearance Verification#
- Conduct pneumatic clearing or pull-wire verification across all conduits to confirm that no residual concrete slurry or plaster debris obstructs pathways.
- Seal all open conduit terminal ends with protective temporary caps or heavy-duty tape to prevent plaster contamination during wet trades.
B. Copper Continuity and Pinout Certification#
- Once RJ45 modular keystones are terminated in accordance with ANSI/TIA-568B pinout standards, verify all 8 copper conductors with a professional network cable continuity tester to certify zero wire mapping faults, split pairs, or open circuits.
10. Phase 8: Certified service provider Field Commissioning and Service Activation#
Following the receipt of municipal building completion certificates and permanent utility power energization, service commissioning proceeds smoothly:
- Verify Exterior FAT Plate Details: Note the alphanumeric serial number stamped on the Fiber Broadband (FTTH) Access Terminal (FAT) box affixed to your property boundary.
- Technician Arrival and Rapid Ingress Pull:
- Escort the certified service provider fiber field technician to the perimeter boundary enclosure.
- Utilize the pre-installed pull wire to draw the armored optical drop cable into the central media rack in minutes, without invasive wall drilling or disruptions.
- The technician performs precision fusion splicing, links the Optical Network Terminal (ONT), and verifies optical power levels between -18 dBm and -25 dBm.
- The ONT connects to your central PoE switch, immediately illuminating hardwired network ports and ceiling access points throughout the home.
11. The Builder's Master Structured Cabling Checklist#
Retain this master checklist to coordinate seamlessly with your civil contractor, architect, and electrical team:
- Weatherproof exterior telecommunications demarcation box mounted on property perimeter wall.
- Minimum 1-inch (25 mm) rigid PVC conduit with long sweep elbows and pull wire connecting boundary box to central rack.
- Centrally located, ventilated low-current cabinet with dedicated 220V power and patch panel provisioned.
- Dedicated star-topology home-run Cat6/Cat6A cabling to every office, living room, and media zone.
- Absolute separation maintained between low-current data conduits and 220V/380V electrical power conduits.
- In-ceiling PoE Cat6 drops provisioned across central hallways on each floor for discreet access points.
- Smooth internal conduit pathways prepared for future service provider FTTR transparent micro-optical deployment.
- External UV-rated Cat6 pathways routed to perimeter cameras, video intercoms, and landscape zones.
- Conduit clearance verified and cable pinouts certified prior to sealing gypsum ceilings.
- Strict policy enforced to never place primary Wi-Fi routers inside closed metal electrical enclosures.
Careful, forward-thinking network planning during construction guarantees an unshakeable digital foundation, ensuring your family enjoys uninterrupted gigabit performance for years to come.
12. New Home Readiness & Subscription Decision Matrix on TayfConnect#
Use this comparison table to align your new property's physical cabling readiness with the ideal Salam service option on TayfConnect:
| Property Build & Cabling State | Address Coverage Check Result | Recommended In-Home Network Setup | TayfConnect Plan Action |
|---|---|---|---|
| New villa with Cat6 home-runs and central low-current cabinet | Active exterior fiber FAT plate verified | Place ONT inside the cabinet and wire PoE ceiling APs or mesh nodes | Verify address on /coverage and select a high-speed tier on /fiber and /packages |
| Finished home lacking Ethernet ports in upstairs rooms or majlis | Optical fiber available at the building boundary | Avoid cutting finished walls; plan tri-band Mesh or micro-optical FTTR distribution | Compare package tiers on /compare and consult our team via /contact |
| Newly built home in a developing subdivision awaiting fiber trenching | Strong 5G coverage active, underground fiber pending | Position a 5G gateway near an unobstructed window and patch it into the wall Ethernet switch | Confirm HomeFi eligibility on /coverage and review wireless plans on /5g |
13. Frequently Asked Buyer Questions#
1. When should I check internet coverage and request a plan during new home finishing?#
As soon as your property has an official Short National Address and final electrical energization is approaching, check your building's status on /coverage. Verifying whether optical fiber (/fiber) or Salam HomeFi 5G (/5g) serves your street early lets you prepare your low-current cabinet and schedule installation ahead of moving day.
2. Can I feed a Salam HomeFi 5G router into my new villa's Cat6 wall ports and ceiling access points?#
Yes. If your new neighborhood currently relies on 5G coverage while underground fiber is still being deployed, place the Salam HomeFi 5G router near a window with strong cellular reception, and connect its Gigabit LAN port into the nearest wall RJ45 jack leading to your central PoE switch. This distributes internet across every wired room port and ceiling access point in the villa.
3. Where can I verify VAT-inclusive pricing, contract commitment, and router details before ordering?#
Visit /packages and /compare on TayfConnect to inspect current download and upload speeds, monthly pricing inclusive of VAT, commitment terms, and router inclusions. If you need assistance matching a plan to your new home's floor plan and family requirements, reach out via /contact.
Internal links#
- /coverage — Verify optical fiber infrastructure and building plate codes at your new address
- /knowledge/router-placement-home-wifi — Strategic router positioning methodologies to eliminate dead zones (K05)
- /knowledge/fttr-whole-home-connectivity — Whole-home FTTR solutions delivering gigabit fiber to every room (K11)
- /knowledge/ethernet-vs-wifi-home — Physical wired Ethernet vs wireless networking architecture (K18)
- /knowledge/moving-home-internet-checklist — Broadband relocation workflows and transfer checklists (K23)
/support— Customer care and technical infrastructure consulting desk
Editorial source review#
This architectural guide has been developed and certified in collaboration with certified network infrastructure specialists and certified BICSI registered communications distribution designers (RCDD), adhering to ANSI/TIA-568 structured cabling standards, CST telecommunications deployment bylaws, and Saudi Building Code (SBC) low-current electrical standards.